Quick answer
To fax from an iPhone, scan or import your document in a fax app, enter and verify the destination fax number, add an optional cover page, review every page, send, and keep the delivery confirmation.
You can send a fax from an iPhone without connecting it to a traditional fax machine. The iPhone supplies the camera, files, and internet connection; a fax app such as Fax Prime handles the connection to the recipient’s fax line. The important work happens before you tap Send: preparing readable pages, entering the correct number, and checking the final document.
This guide walks through the complete workflow in plain language. The exact labels may change as the app is updated, but the underlying process stays the same.
What you need before sending a fax
Have four things ready:
- An iPhone with a reliable internet connection.
- A fax app that can transmit documents to fax numbers. Fax Prime is the example used here.
- The recipient’s complete fax number, including the correct country and area codes.
- The document you want to send, either on paper or saved as a file.
If the document contains private or time-sensitive information, confirm the recipient and number through a trusted source. A phone number from an old form or an unofficial search result may no longer reach the intended office.
An iPhone cannot normally call a fax machine and transmit page tones by itself. A fax app bridges the digital document on your phone to the receiving fax line. That is why an internet connection and an active service are part of the workflow.
Step 1: Scan or import the document
Open Fax Prime and start a new fax. Add the pages you want to send in one of two ways.
Scan paper pages. Place the document on a flat surface with even light. Hold the phone parallel to the page, keep all four corners visible, and avoid casting a shadow over the text. Scan one page at a time. If the page contains a signature, small type, or a faint stamp, zoom in during review to make sure it remains legible.
Import an existing file. If the document is already a PDF or image, import it from Files or another available source in the app. A digital original will usually be sharper than a photograph of a screen or a printed copy.
Put the pages in the order the recipient should read them. A cover page, if used, comes first. Forms and supporting evidence should follow in a logical sequence. Remove accidental scans, blank pages, and duplicate attachments before continuing.
Step 2: Verify the fax number
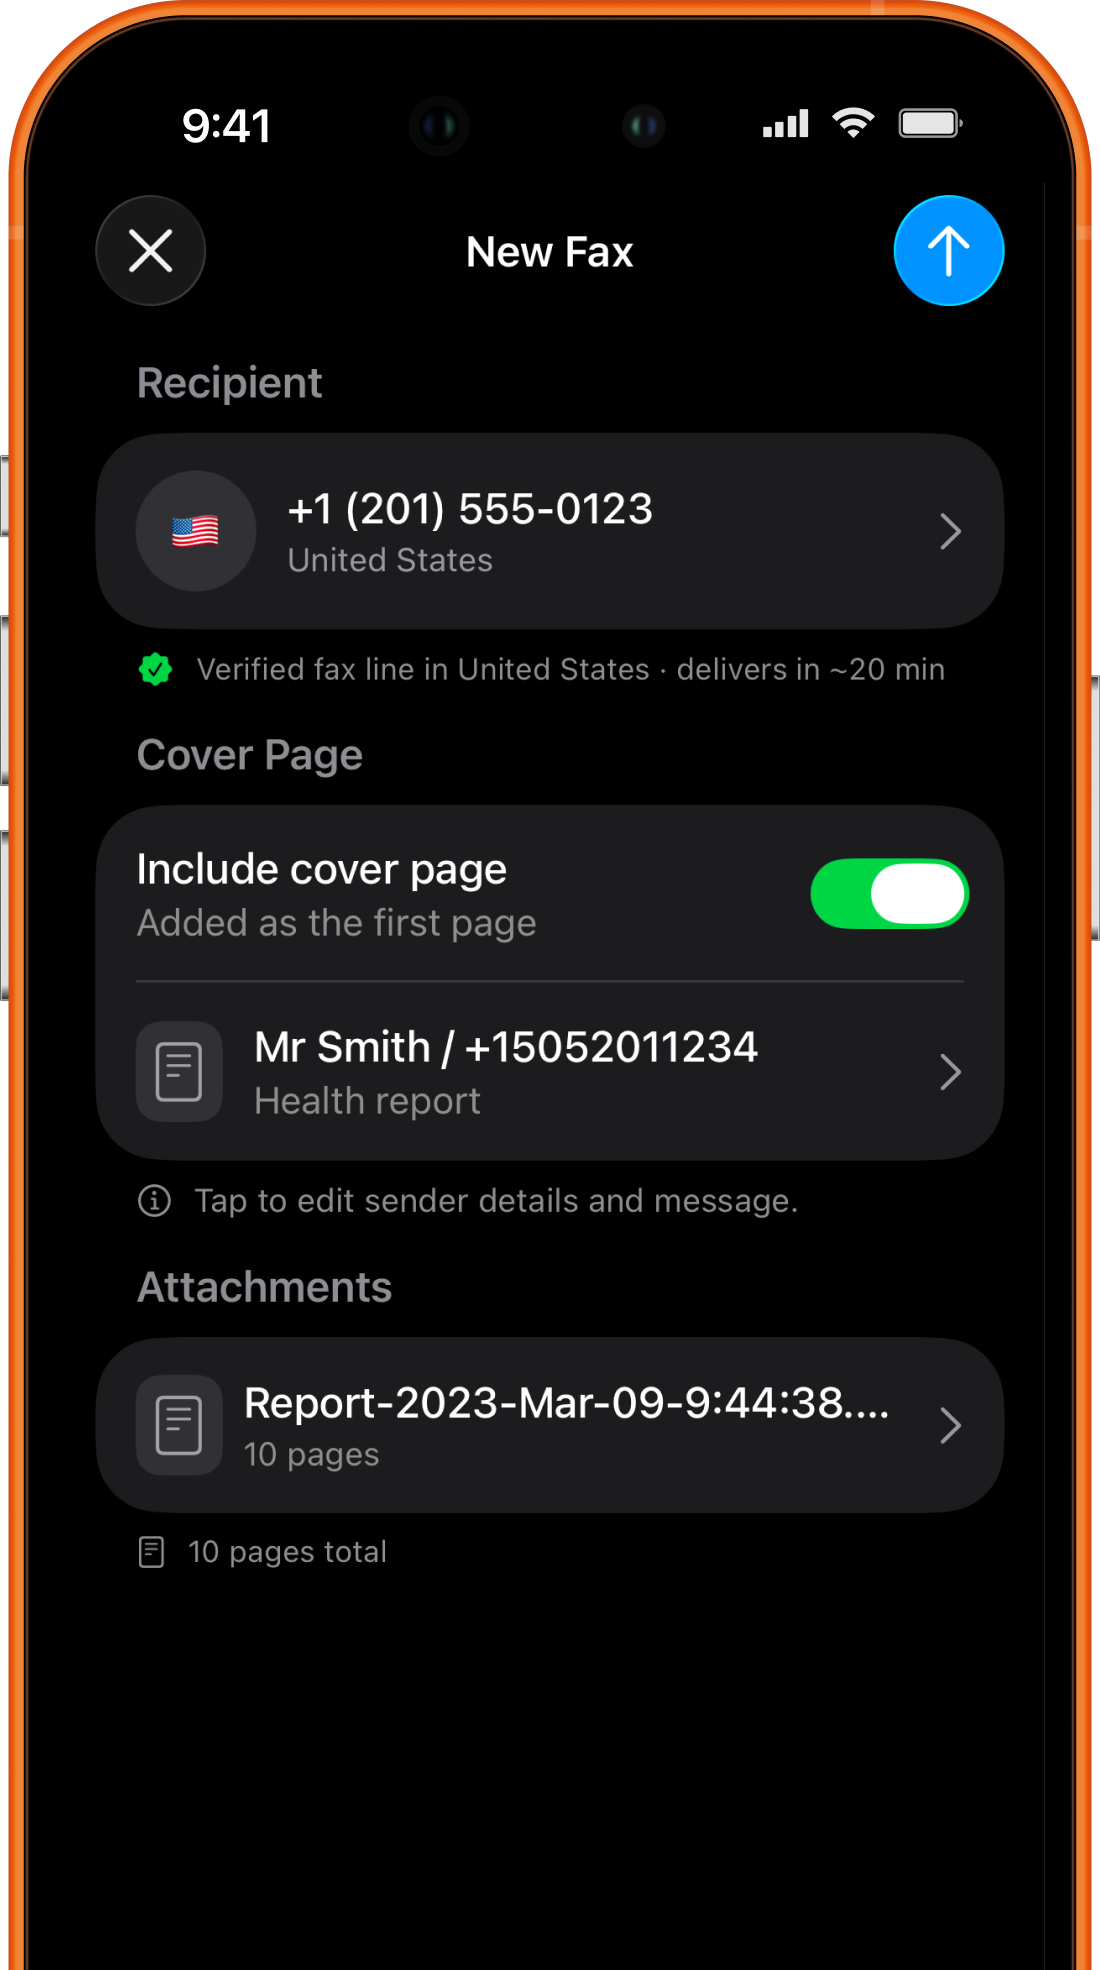
Enter the destination fax number exactly as the recipient supplied it. Select the right country, then check the area code and every remaining digit. Do not assume that a main office telephone number also accepts faxes.
Read the number back against the source instead of relying on visual familiarity. This small habit catches transposed or repeated digits. For sensitive paperwork, confirm the number directly with the organization and ask whether the fax should be addressed to a specific department or person.
International formats deserve extra attention. The app may display the country calling code separately, so do not add or remove digits until you understand how the final number is shown. If the recipient gave special dialing instructions, clarify whether they apply to ordinary phone systems or to an internet fax service.
Step 3: Add a cover page when it helps
A fax cover page tells the receiving office what arrived and who should handle it. It is especially useful when several people share one fax line. Include only the information needed to route and identify the transmission:
- Sender and recipient names.
- Company or department, when relevant.
- Sender contact information.
- Date and total number of pages, including the cover page.
- A short subject or handling note.
Avoid putting unnecessary private details on the cover page because it may be visible before the rest of the document is collected. A label such as “Confidential” communicates intent, but it does not guarantee that only the named recipient will see the fax. Use our free fax cover sheet generator to fill a General, Business, or Confidential template and download a completed PDF without an account. Add it as the first page and include it in the total page count.
If the recipient provides its own cover-page instructions, follow those instead. Some offices use the first page to route forms to a case, account, or department.
Step 4: Review and send the fax
Open the final preview before you send the fax. Check every page at a readable zoom level. Look for cropped edges, sideways pages, blurred text, glare, dark shadows, and marks covering important fields. Confirm that signatures and dates appear where expected.
Then compare the recipient’s fax number one last time. This is the final opportunity to catch a wrong destination before the transmission leaves your phone.
When the document and number are correct, send the fax. Keep the app open if it asks you to do so, and avoid rapidly switching networks while the upload begins. Transmission is not always instantaneous: the receiving line can be busy, offline, or temporarily unavailable.
Step 5: Keep the confirmation
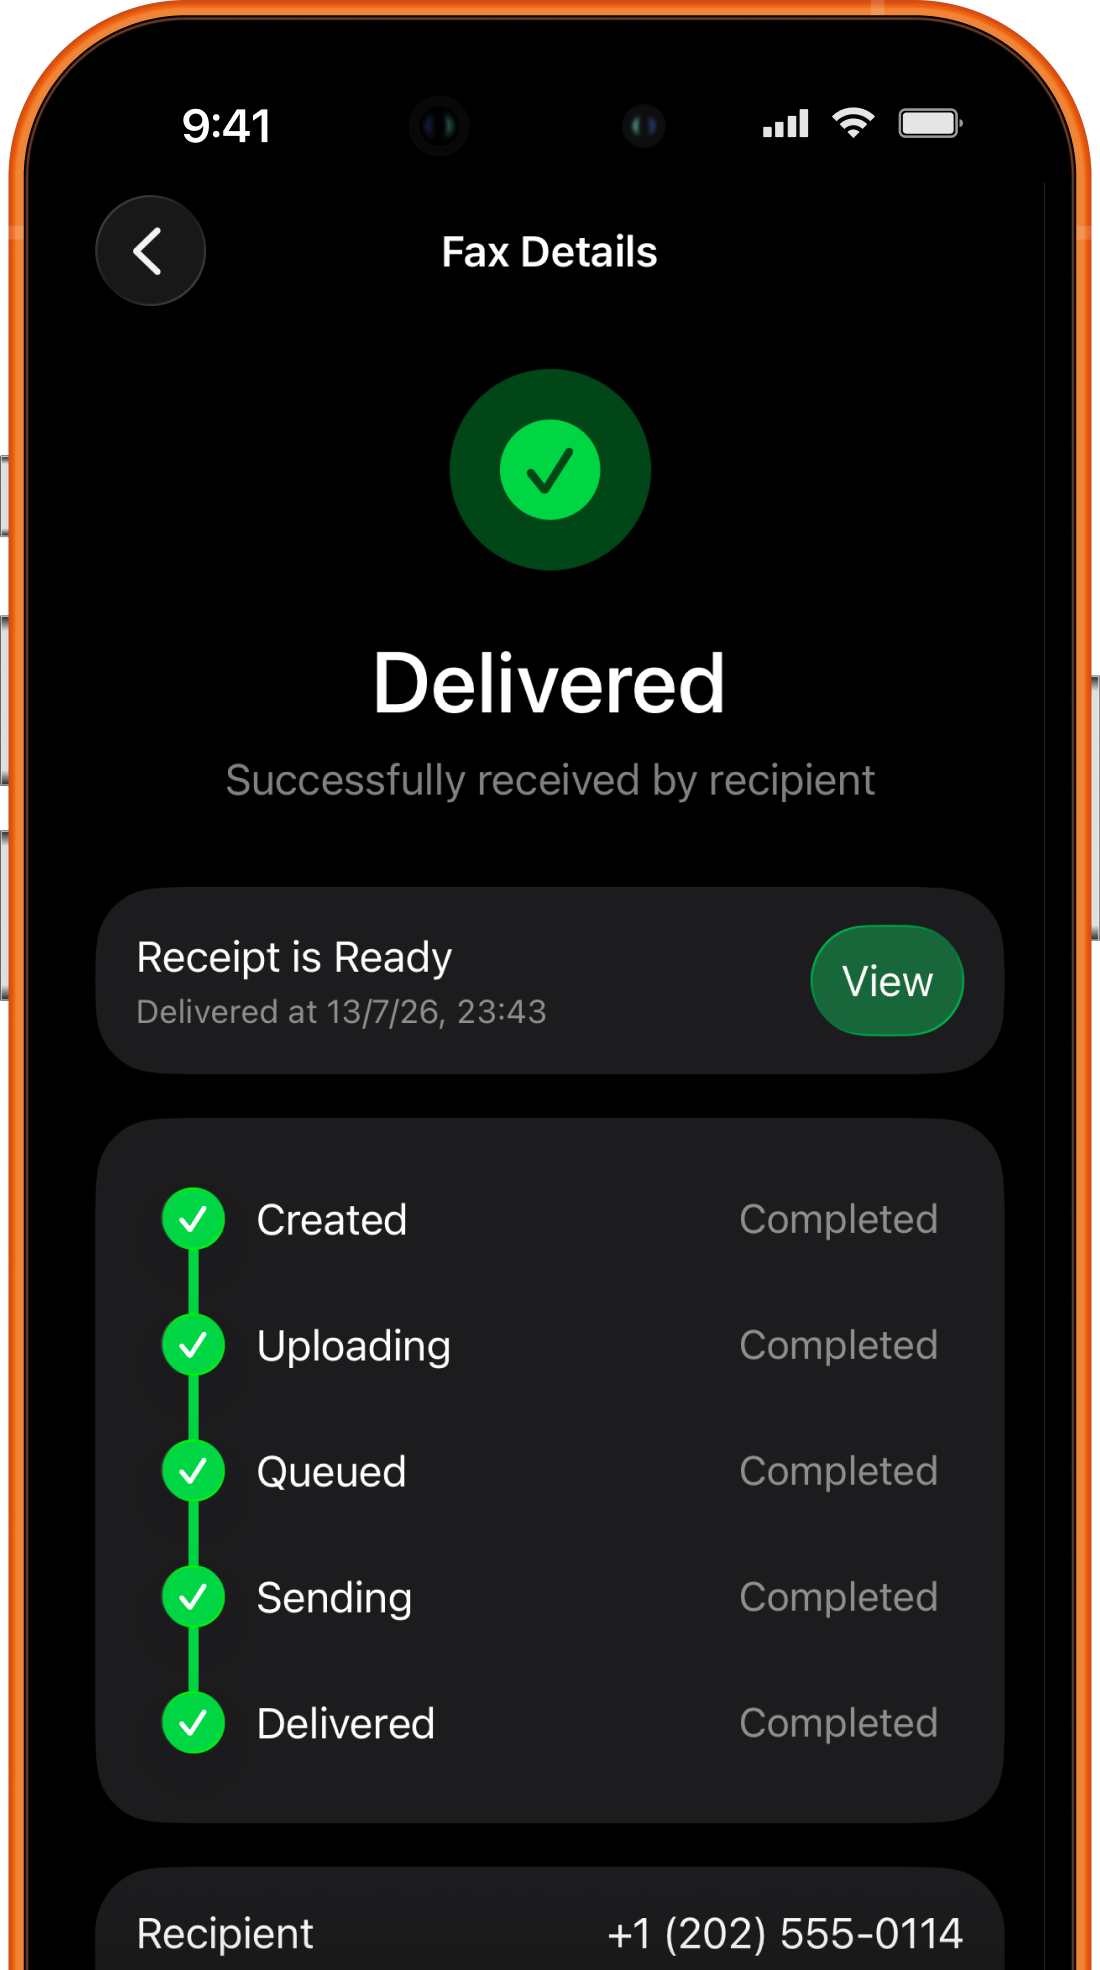
Do not treat tapping Send as proof of delivery. Watch the fax status until it reports the final result. Delivered means the service finished transmitting the fax; Queued or Sending is not yet final. Learn how to interpret and retain the result in the fax confirmation page guide.
Keep the confirmation when the document matters. Record the date, destination number, status, and any confirmation identifier shown by the service. If a deadline or dispute is possible, also retain the exact version of the document you sent. A recipient may still need to match the fax to a person, account, or case after the machine accepts it.
A final checklist before you tap Send
Use this short checklist for any important transmission:
- The recipient confirmed that this is a fax number.
- The country and area codes are correct.
- Every page belongs to this recipient.
- Pages are readable, upright, complete, and in order.
- Required fields, dates, initials, and signatures are present.
- The cover page has the correct page count and routing details.
- You know where to check the final delivery status.
This review takes less time than correcting a fax that reached the wrong place or arrived without a critical page.
Common iPhone fax problems
The scan is hard to read. Rescan the page in brighter, even light. Clean the camera lens, place the paper on a contrasting background, and hold the phone directly above it. Do not increase contrast so aggressively that thin handwriting disappears.
The fax remains pending. The receiving line may be busy or the connection may still be processing the document. Wait for the app’s final status rather than sending duplicate copies immediately. If the status fails, use the failed-fax troubleshooting checklist before trying again.
The document is too large or complicated. Remove pages that are not required, use the original PDF where possible, and split a transmission only if the recipient agrees. Label separate parts clearly so they can be reassembled.
A PDF will not import. Confirm that it opens normally in Files. Password-protected or damaged PDFs may need to be unlocked or recreated by an authorized person before a fax app can process them. See how to fax a PDF from an iPhone for a focused workflow.
The recipient says nothing arrived. Compare the number and final status, then ask the recipient to check the correct device, queue, or department. Provide the transmission time and page count without sending sensitive contents through an insecure channel.
Frequently asked questions
Can I fax from my iPhone for free?
Apps and plans differ, and current pricing can change. Review the live App Store listing and the purchase screen before sending. Do not assume that installing an app includes a particular number of pages or destinations.
Can I fax a photo from my iPhone?
Yes, when the fax app accepts images. For a document, a clean scan or original PDF is usually easier to read than an ordinary photo. Crop away the desk, rotate the page correctly, and inspect small text before sending.
Do I need a fax number to send a fax?
You need the recipient’s fax number. You do not necessarily need your own receiving number merely to send, although service requirements differ. To accept incoming documents, follow the app’s receiving setup and see how to receive a fax on an iPhone.
Is an iPhone fax the same as email?
No. You prepare the document digitally, but the service transmits it to a fax destination. Delivery status and addressing work differently from email, so verify the fax number and retain the transmission result.
Should I call after sending?
For urgent, regulated, or deadline-sensitive paperwork, follow the recipient’s instructions. A confirmation call can verify that the correct office matched the fax to the right record, but do not disclose sensitive information to an unverified caller or number.